Are you facing the daunting task of a malfunctioning water pump and considering taking matters into your own hands? You’re in the right place! Replacing a water pump can seem like a complex and intimidating project, but with the right guidance, it can be a straightforward DIY endeavor.
In this step-by-step guide, we’ll walk you through everything you need to know, from gathering the necessary tools and materials to completing the installation successfully. Whether you’re a seasoned DIY enthusiast or a curious beginner, our friendly approach will help you navigate this task with confidence. Let’s dive into the world of water pumps and empower you to tackle this project like a pro!
Understanding Your Water Pump and Its Function
Water pumps play a crucial role in a variety of applications, from household usage to industrial systems. Understanding the function of your water pump can significantly enhance your ability to maintain and replace it when necessary. Essentially, a water pump works by moving water from one location to another, utilizing principles of mechanical energy and hydraulics. In most cases, pumps operate by creating a vacuum that draws water into the pump chamber and then pushing it out through a discharge pipe. Key components of a typical water pump include:
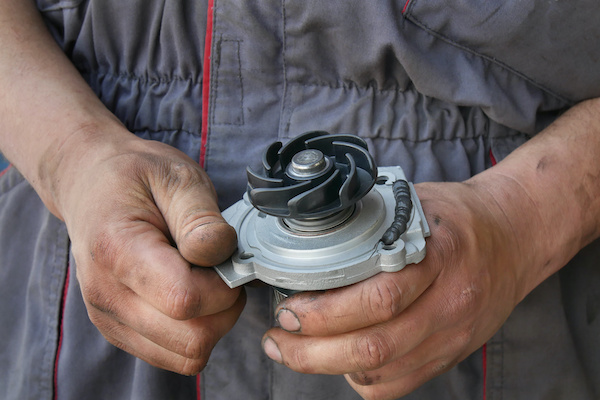
Impeller: Responsible for driving the water through the pump.
Motor: Provides the power needed to operate the pump.
Volute: A spiral-shaped casing that directs the flow of water.
Seal: Prevents leaks and maintains pressure within the pump.
Regular maintenance and knowing how to recognize signs of wear can help prolong the life of a water pump. Symptoms that may indicate a malfunction include unusual noises, decreased water pressure, or leaks. Understanding these signs can prompt timely intervention, ensuring that your water system runs smoothly. When it comes to replacing your pump, familiarize yourself with various types of pumps available, such as:
| Type of Pump | Ideal Use |
|---|---|
| Submersible Pump | Deep wells and underground applications |
| Jet Pump | Shallow wells and surface water |
| Utility Pump | General water removal and flood control |
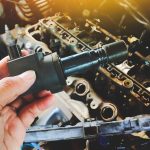
Gathering Essential Tools and Materials for the Job
Before diving into the task of replacing your water pump, it’s crucial to gather all the necessary tools and materials to ensure a smooth process. Investing in quality tools not only makes the job easier but also helps avoid potential damage to your vehicle or the new pump. Here’s a list of essential items you’ll need:
Socket set – for removing and tightening bolts.
Wrench set - adjustable or fixed to reach tight spots.
Screwdriver set – flathead and Phillips for various screws.
Pliers – particularly needle-nose for grasping in tight areas.
Coolant - to refill the system after replacement.
New water pump - ensure it’s compatible with your vehicle model.
Gasket or sealant – for a secure fit and to prevent leaks.
Drain pan - to catch any leaking coolant during the process.
In addition to tools, having the right materials on hand can save you time and frustration. Make sure to have safety gear ready to protect yourself while you work. Here’s what you should consider:
| Safety Gear | Purpose |
|---|---|
| Gloves | Protects your hands from sharp edges and hot components. |
| Safety goggles | Safeguards your eyes from debris or coolant sprays. |
| Work apron | Keeps your clothes clean and provides extra pockets. |
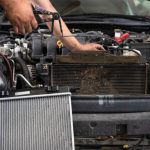
Step-by-Step Instructions for Safe and Effective Replacement
Before you dive into the replacement process, ensure you have the right tools and safety gear at hand. To begin, disconnect the power supply and drain the coolant from the system, as this will prevent any accidents or spills. Gather the following tools:
Socket set
Wrench set
Coolant catch pan
Replacement water pump
Gasket sealant
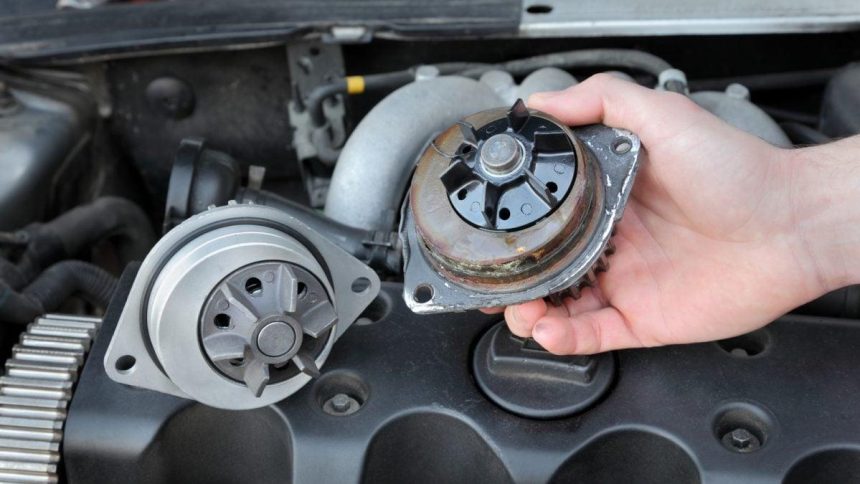
Once everything is ready, begin by removing the old water pump. This usually involves loosening the bolts and carefully lifting it out. Make sure to check the surrounding areas for any signs of wear or damage. After successfully taking out the old pump, clean the mounting surface thoroughly before placing the new pump. Apply the gasket sealant as necessary, then position the new pump and tighten the bolts in a criss-cross pattern to ensure even pressure. Don’t forget to refill the coolant and reconnect the power supply to complete the installation!
Common Mistakes to Avoid and Helpful Tips for Success
When tackling a DIY water pump replacement, it’s easy to fall into a few common traps. One of the biggest mistakes is overlooking the importance of the manual. Your vehicle’s maintenance manual can provide invaluable insights specific to your model, such as torque specifications and proper installation sequences. Another common error is neglecting to drain the coolant properly before starting the process. Failing to do so can result in spills and messes, which can complicate your work. Moreover, ensure you have the right tools and parts on hand; using incorrect or worn-out tools can lead to frustration and potential damage to your vehicle.
To maximize your success and minimize hassle, follow some helpful strategies. First, create a step-by-step checklist of tasks to keep you organized throughout the process. This can be something as simple as a notepad or digital app. Additionally, consider taking a few progress photos as you go; they can serve as a reference when reassembling parts. Remember to also label and store your bolts and screws in an organized manner, as losing even one can prolong the job. don’t rush the installation! Allowing sufficient time to ensure everything is done correctly will save you from future headaches.
Q&A
Q&A: How To Replace a Water Pump - A Step-by-Step DIY Guide
Q1: What tools will I need to replace a water pump?
A: To replace a water pump, you’ll typically need a set of basic hand tools, including:
- Socket set
- Wrench set
- Screwdrivers (flathead and Phillips)
- Pliers
- Torque wrench
- Gasket scraper or razor blade
- Fluid catch pan (to collect any spilled coolant)
- Safety glasses and gloves
Q2: How do I know if my water pump needs to be replaced?
A: Signs that your water pump may need replacement include:
- Overheating engine
- Coolant leaks under the car
- Whining or grinding noises from the pump area
- Steam coming from the radiator
- A loose or wobbly pump pulley
Q3: Is it safe to replace a water pump on my own?
A: Yes, replacing a water pump can be a safe DIY project if you have some basic mechanical knowledge and follow proper safety precautions. Always ensure that your engine is cool before starting, and wear safety gear to protect yourself from any debris or spills.
Q4: What is the first step in replacing a water pump?
A: The first step is to prepare your workspace. Make sure you have enough room to work safely and gather all your tools and materials. Next, you should disconnect the battery to prevent any electrical issues.
Q5: Do I need to drain the coolant before replacing the water pump?
A: Yes, you will need to drain the coolant from your radiator to prevent spills and manage the flow of fluid during the replacement. Place a fluid catch pan beneath the radiator, and drain the coolant by opening the petcock valve or removing the radiator cap.
Q6: Will I need to replace any gaskets or seals?
A: Yes, it’s a good practice to replace the gasket or O-ring that seals the water pump to prevent leaks. Always check for any damaged or worn seals when removing the old pump, and make sure to scrape off any remnants of the old gasket before installing the new one.
Q7: How long does it typically take to replace a water pump?
A: The time it takes can vary based on your experience and the vehicle model, but generally, it can take anywhere from 2 to 4 hours. If you’re replacing it for the first time, it might take a bit longer, so don’t rush the process.
Q8: Are there any special tips to keep in mind during this process?
A: Absolutely! Here are a few tips:
- Take pictures of each step as you go to help with reassembly.
- Label any bolts or parts you remove to ensure you know where they go later.
- Follow the manufacturer’s specifications for torque settings when reattaching components.
- After you’ve completed the installation, fill the system with fresh coolant and run the engine to check for leaks.
Q9: What should I do after installing the new water pump?
A: After installation, recheck all connections, refill the coolant system, and run the engine. Monitor for any leaks and ensure the engine reaches its normal operating temperature without overheating. It’s also advisable to check your coolant levels after a few days to ensure everything is functioning properly.
Q10: Can I really save money by doing this myself?
A: Yes! Replacing a water pump on your own can save you a significant amount of money compared to paying for labor at a garage. Plus, it’s a great way to learn more about your vehicle and develop your DIY skills!
Feel free to reach out if you have any more questions as you embark on your water pump replacement journey! Happy wrenching!
Future Outlook
replacing a water pump may seem daunting at first, but with the right tools, a bit of patience, and the step-by-step guidance provided in this DIY guide, you can tackle this project with confidence. Remember to take your time, double-check your work, and always prioritize safety. By following these instructions, not only will you save money on labor costs, but you’ll also gain a sense of accomplishment and a deeper understanding of your vehicle’s mechanics. If you encounter any challenges along the way, don’t hesitate to consult your vehicle’s manual or seek advice from online forums or a trusted mechanic. Happy wrenching, and may your new water pump keep things running smoothly for miles to come!